I climb the concrete steps of the parking garage and walk the 100 ft length of the second floor to the Western wall. About halfway along I find myself in front of a metal door, a card reader to my left. I wave my hand in front of the reader and smile as the LED turns green and the door clicks open – no badge required.
NFC Implants
The door opening trick wasn’t a slight of hand, nor was it a faulty sensor. It was the end result of a high tech upgrade my body had received days prior; an NFC implant installed just below the surface of the skin on my left hand which could be used to store data, open doors and perform any number of other simple tasks.
So, what is it? NFC stands for Near Field Communication; it is a specific type of RFID (Radio Frequency Identification) protocol first developed in the 1980’s. Since the technology was first created it has evolved and become commonplace; with most ‘tap to pay’ credit cards using a type of NFC technology and all high-end smart phones containing an NFC chip. While the tech is often used to process payments or provide access to secure doors, it can also be used to store arbitrary data, though slow transfer speeds mean storing large quantities of data would be pointless.
I have always been tangentially interested in NFC technology, particularly when it was used to control access to doors at my last job, but it’s never really been something I’ve researched extensively, at least not until the summer of 2020 when I finally had a use for storing small amounts of sensitive data close to me.
Background
It was September of 2020 and things were going pretty well at the company my buddy and I ran on the side – we had just rolled out a new billing system/clientarea and sales were doing pretty good. Then, one fateful afternoon the proverbial shit hit the fan and threw a monkey wrench into our plans – 2 solid state drives in a mirror configuration died at seemingly the same time, taking one of our company’s servers offline.
The end result of this incident was that we nearly lost our entire customer database due to improperly configured backups. Thanks to some un-deleted database dumps (laziness pays off!) and the fantastic Test Disk software we were able to get our company back up and running, but it was a wake up call we needed to hear – backups are important, and they need to be tested.
Since the ‘September Incident’ we have implemented a better (tested) backup strategy, but the incident got me thinking about backups of my own personal data, and how vulnerable I was to a similar catastrophic failure so I began to consider the possibilities of backing up my own data to prevent a similar situation.
One of the key pieces of data I needed to backup was the database from my Vault instance – the storage engine for the secrets (passwords, OTP backups, private keys, etc) of my entire digital life. If my Vault was to disappear overnight the results would be somewhere between catastrophic and restarted my entire digital existence from scratch. It needed to be backed up.
Fortunately, backing up Vault, at least in the way I had installed it, is pretty easy. Simply copy the database files to an external location. To restore the vault; install the latest version of the software, replace the database files and you’re good to go. The database itself is encrypted at rest, so it can be stored anywhere, even on cloud storage; the tricky part becomes how to store the decryption keys needed to regain access to the Vault in the event that it be restarted or restored. While I currently had a couple of encrypted flash drives which held the decryption keys necessary to regain access, if I happened to be out of town and needed to restore from backup I would essentially be out of luck, unless I wanted to arrange shipping of one of the flash drives. I needed some way of storing a few bytes of data close to me.
Exploring the options
I knew I needed to be able to store a small amount of data (several decryption keys) with me at all times, and there were several ways of doing that. The simplest idea was to just carry a flash drive around, however, that would require me to have access to a PC, and I had already managed to ditch my keys so I didn’t have a keychain I could put it on. Another option was to store the data on a smartphone, however, whenever I travel I tend to bring a disposable phone with me that gets reformatted before and after the trip, copying encrypted strings of text across would be a pain. A third option I thought of was to store the data on my smartwatch, however, retrieving arbitrary data from a smartwatch device doesn’t look particularly simple and I ideally wanted something easy, because if I needed to use it I would probably be panicking. Eventually I stumbled upon the concept of NFC tags.
NFC tags seemed to be the ideal solution – they were small, and could be incorporated into a piece of jewelry or clothing and they were nearly universally accessible; even if I was overseas without a phone I would be able to pop into any store and purchase an NFC capable device and read the data off the tag fairly trivially. While researching different types of NFC tags I stumbled across the Dangerous Things website – a vendor out of Washington State who has developed a line of implantable NFC chips which can be installed just below the skin of your hand – something you’re not going to loose or forget!
Choosing an Implant
After doing bit of research on NFC implants I decided that it was something I was ultimately willing to go ahead with, the installation procedure seemed innocuous enough and the ability to write and rewrite the chip meant I would be able to use it for multiple functions, even if my original use case became no longer applicable. Now the only task was to wade through the documentation for each chip and determine which one I needed to order – there were a few to choose from!
Fortunately for me Dangerous Things publishes a list of implants and the functions of each, which gave me a good starting foundation to base my research on.
In the end I decided to go ahead with the NExT implant for a couple of reasons:
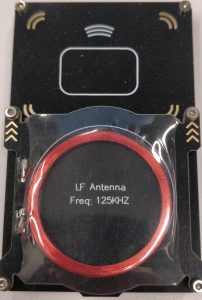
- It supports dual frequencies – 125KHz and 13.56 MHz. While all the newer NFC technologies (such as those in smartphones and payment cards) use 13 MHz, older buildings often use access control systems based on 125KHz standards. If I was getting a chip permanently embedded in my hand I wanted to be able to potentially use it for other cool things, like gaining access to my office or home.
- The 13MHz side can store up to 820 bytes of user-data. This is more then enough data to store my decryption keys and potentially some other information as well
- Reading and writing to the chip is easy from any smartphone. While the cryptographic functions on some of the other chips look pretty cool, I ultimately wanted something that was as simple as possible. Plus, by encrypting the data outside of the tag I would be able to read it on any compatible NFC reader and then decrypt the text externally – no special apps or readers required.
I went ahead with an order and the package arrived within just a few days. I did have to pay some import taxes on it, and I legitimately wonder what the customs officials thought when inspecting it!
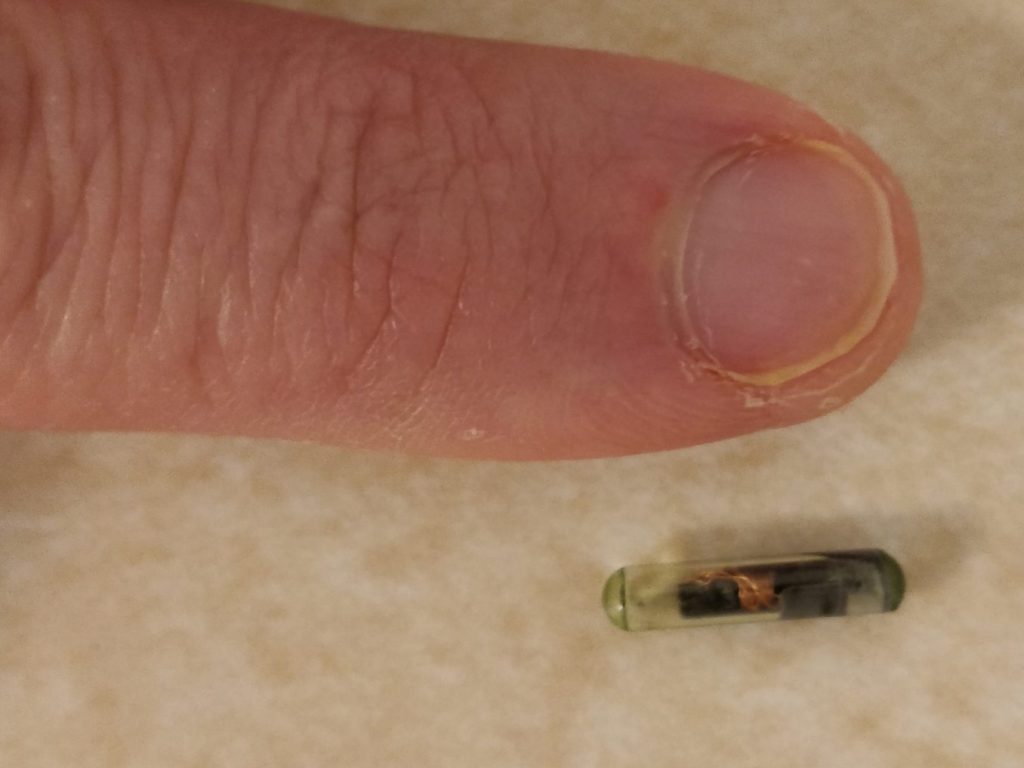
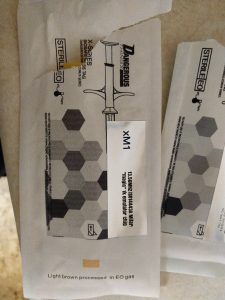
The implant is shipped in a pre-sterilized, sealed package which is not supposed to be opened until the time of installation in order to reduce the chance of infection, so I had no way of testing the chip before hand, however, the build quality on these things is pretty good and according to my research there were never any reported DOA devices, the next task was to schedule an installation appointment.
Installing the Implant
The installation procedure is actually fairly simple. The implant comes preloaded in an injection assembly and is installed similar to receiving h hypodermic injection; The business end of the is poked under the skin, and then the operator depresses a plunger which pushes the implant out of the tube and into place. The procedure itself is quite straightforward and can be performed by anyone familiar with antiseptic procedures and piercings, however, Dangerous Things does maintain a list of installers certified by the company. Rather then trying to explain the concept to a third party body piercer who might have liability concerns, I opted to reach out to Russ Fox who was my closest installer. After a bit of back and forth we arranged a date for my technological upgrade and before long I found myself sitting in a downtown Vancouver tattoo parlor preparing for what was arguably one of the more invasive procedures I had willingly subjected myself to.
The implants are typically installed in the soft webbing between the thumb and index finger. The soft tissue is easy to access, and once it heals around the implant, it provides cushioning which protects the implant from damage, even if it takes a direct impact!
Never having had a piercing before, I’ll admit I was a bit apprehensive about the whole thing, but as it turned out my apprehension was unfounded. After cleaning the injection site Russ had me take a deep breath, and, before I had even finished exhaling Russ was proudly announcing that I had been “chipped” and I had a bandage slapped on the injection site. The whole process took less then 5 minutes, and the only pain I experienced was a slight pinching sensation roughly on par with the one I experienced when I received my COVID vaccination.
As Russ was finishing up, I asked him how many of these installations he had done. The reply of “more then a thousand” surprised me; there are clearly more implanted people out there then I had originally thought. As I left the parlor I became aware of a very slight ache in the vicinity of the injection site – this coupled with the initial pinch is as bad as it would get, and after a couple of days I barely noticed any discomfort. The whole process was faster and easier then I had expected, and the professionalism and confidence Russ demonstrated was fantastic. 5/5 would recommend!
About 36 hours later I broke down and peeled the bandage off, in order to inspect the injection site. What I saw surprised me – just a small scab where the needle pierced my skin. I’m not sure what I expected, but this was definitely less dramatic then I was expecting.

Programming the Implant
After the successful implantation I downloaded and installed the Dangerous Things App and used it to secure the high frequency part of the implant with a password. Basically, what the app does is lock down the chip from it’s default (unsecured) state by adding a password and disabling the ability to change the configuration bits without the password. Reading and writing to the chip’s user memory is still supported, but it means that a malicious actor can’t brick your implant by getting too close.
Writing user data to the implant is actually very simple and can be done with any of the number of Android apps designed to interact with NFC tags. The one gotchya is that finding the NFC “sweet spot” on a consumer smartphone can be a bit tricky. Since phones are designed to interact with cards that have a comparatively large antenna, coupling with the small coil antenna inside the implant is a little more finicky. Eventually, I found the orientation which works, and after enough practice I can usually read my implant on the first try, but using a different smartphone means I need to rediscover the proper location and orientation. Not a big deal, but just something that was good to be aware of before thinking that my implant was DOAed!
I trialed a couple of different pieces of Android software designed to read/write tags, and eventually settled on the NFC Tools app because of the features it supported and the user interface, though any NFC tag writing app will do the job. Android even has a (limited) reader built into the operating system, and holding any NFC-enabled phone up to my hand will actually read the data on the implant!
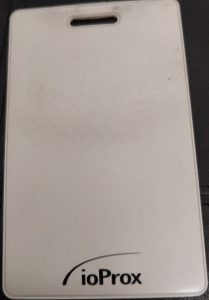
Once I had my data safely stored on the High Frequency NFC chip, I decided to investigate the Low Frequency capabilities of this device. As I mentioned, the unique thing about the NExT is that it supports both standard NFC and legacy 125KHz devices; meaning it should be possible to emulate a variety of legacy access control systems. As luck would have it, the system at my office was one such example, using the Kantech IOProx standard to control access to the buildings.
Cloning 125KHz cards isn’t as simple as using an Android phone, since it requires hardware capable of communicating on the lower frequencies. About of hour of research lead me to the Proxmark3 – the Swiss Army Knife of RFID hacking which would do the trick. Using the Proxmark I was able to read my existing card and gather crucial information like the facility code, card number and version, then rewrite the information onto my implant by placing the Proxmark ontop of my hand. One quick trip to the office later and I was using my newfound cyborg powers to open the front door!
I plan on writing another blog post once I have all the tricks of the Proxmark figured out, but until then here’s the thread on the Dangerous Things forum I used as reference material to get it working.
A Word of Caution
I’ll end this blog post with a note of caution, to hopefully help someone else avoid a lot of frustration – be VERY careful when dicking around with the programming of an implant. It is very possible to brick these things and put them in a state where they are essentially useless, which means you get to live the rest of your life with a useless implant or go through the trouble of having it removed and getting a new one installed. I learned this lesson the hard way when trying to write-protect the NFC side of my implant!
The idea was to load my decryption keys onto the implant and then ‘lock’ it with a password so that it would be impossible to overwrite without explicitly intending to. Unfortunately, there was no way to effectively lock the implant using the GUI of the various NFC tag writer apps I found, so I resorted to using good old hex commands and a tool which allowed me to shove arbitrary data onto the chip. While the commands I used should have worked (and in fact, did work on a sacrificial xNT implant I had ordered to test with) I fat fingered something and actually managed to permanently lock the configuration bits of my implant. I lucked out in that I locked the implant in read/write mode so the user-space is still fully usable – it’s just not possible for me to lock/unlock it. Lesson learned – test everything out on a device not installed in your body, double check your commands, then maybe walk away and check one more time before issuing them! For anyone interested, you can read my thread on the Dangerous Things forum!
In conclusion, I have now become a cyborg (I minimally meet the definition) and can rest easy knowing I always have quick access to the decryption keys for my digital life. the legacy 125KHz chip allows me to access my office without a card, and most importantly, I have a whole new field of hacking to experiment with.